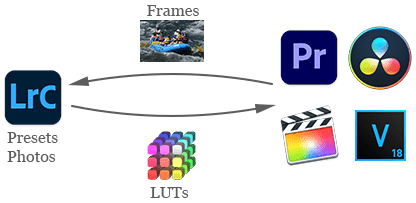
Create LUTs (color lookup tables) from Lightroom presets or the develop settings of photos and video frames.
Use those LUTs on videos in Premiere Pro, DaVinci Resolve, Final Cut Pro X, Vegas, and other apps to get the same look (color grading).
Convert all your XMP presets to LUTs (cubes) with just a couple clicks.
Compared to the IWLTBAP LUT Generator, Export LUT produces more accurate colors, is much easier and faster to use, and has many more options.
Use the Apply LUT plugin to apply LUTs to Lightroom photos.

Download and Install
Export LUT requires Lightroom 5.7, Lightroom 6 / CC 2015, or Lightroom Classic 7 or later.
- Download exportlut.1.37.zip.
- If you’re upgrading from a previous version of Export LUT, exit Lightroom, delete the existing exportlut.lrplugin folder, and relace it with the new one extracted from the downloaded .zip. Restart Lightroom and you’re done.
- If this is a new installation, extract the folder exportlut.lrplugin from the downloaded .zip and move it to a location of your choice.
- In Lightroom, do File > Plug-in Manager.
- Click Add, browse and select the exportlut.lrplugin folder, and click Select Folder (Windows) or Add Plug-in (Mac OS).
The free trial is limited to small LUTs of size 4, which won’t reproduce colors accurately. To export larger cubes, you’ll need to buy a license.
Buy a License
- Buy a license for $9.95:
The license includes unlimited upgrades. Make sure you’re satisfied with the free trial before buying. - Copy the license key from the confirmation page or confirmation email.
- Do Library > Plug-in Extras > Export LUT.
- Click Buy.
- Paste the key into the License key box and click OK.
Using Export LUT
Quick step-by-step recipes with no chatter or hand waving:


For more explanations, watch one of the dozens of video tutorials: English, español (Spanish), русский (Russian), bahasa Indonesia (Indonesian), français (French), 中文 (Chinese), Deutsch (German), ไทย (Thai), italiano (Italian).
Creating a LUT
Invoke File > Plug-in Extras > Export LUT and then:
- Choose the currently selected photo(s) or one or more presets as the source of the develop settings. One LUT will be generated for each photo or preset selected.
If you see the warning “Selected presets or photo have develop settings that can’t be represented by LUTs”, click the Show Settings button; see Limitations of LUTs.
If you see the warning , “This is a raw photo. Non-raw photos better approximate the appearance of a LUT’s look”, use a TIFF or JPEG instead. See Limitations of LUTs.
If you see the warning, “The selected photo doesn’t have an embedded color profile”, use the Assign Color Profile command to assign the correct color profile to the photo. See Video Color Management. - Choose the color profile representing the color space of the images or videos to which the LUTs will be applied. For video, the default Rec 709 Gamma 2.4 is usually the best choice (see Video Color Management). It’s important to use the correct color profile, otherwise the LUT won’t accurately recreate the look of the presets or photo.
- Choose the quality of the LUTs, the number of grid points per color channel. If you’re not sure, refer to the application in which you’ll be applying the LUTs.
There can be noticeable differences between 32, 64, and 100, with differences above 128 hard to discern. But keep in mind that doubling the size of the quality increases the total size of the LUT by eight, making it much slower to read into your video editor. Some video software will clumsily grind to a halt if you try to use very large sizes (e.g. 256). - Choose the destination folder and filename for the generated LUTs. By default the LUTs will have filenames of the form presetorphoto-colorprofile-gridpoints.cube. You can enter your own filename template using the Token dropdown menu.
The LUTs are created in the IRIDAS/Adobe .cube format. Select Generate legacy-format .cube files if your video editor or LUT utility complains it can’t read the LUT. The program “ffmpeg” and the LUT Utility for Final Cut Pro X are two culprits that need this option (they don’t fully implement the Adobe/IRIDAS standard).
Preview LUT
The best way to judge a LUT is to apply it to your videos or images, of course. But you can approximate the LUT’s look within Lightroom using the Preview LUT command. It simply applies the chosen presets to the selected images, minus the develop settings that LUTs can’t represent.
To use Preview LUT, first import and select one or more images that are representative of the videos or photos to which you’ll be applying the LUT. It’s best to use TIFFs or JPEGs rather than raws, since presets can look differently applied to raws. Then invoke File > Plug-in Extras > Preview LUT and choose one or more develop presets.
Preview LUT will then make a virtual copy for each selected image and preset, which you may then examine and compare.
The Export LUT Collection Set
The Export LUT collection set contains two collections:
OK to Delete: Export LUT needs to create and import temporary images to build LUTs. The plugin deletes these from disk, but unfortunately Lightroom doesn’t allow plugins to delete images from catalogs. So you can clean up these images yourself by selecting all the images in this collection and typing Alt-Delete (Windows) or Option-Delete (Mac).
Preset Previews: Every virtual copy created by the Preview LUT command is placed in this collection, making it easy to find and delete. To delete them from your catalog, just select them and do Alt-Delete (Windows) or Option-Delete (Mac).
Assign Color Profile
Use the Assign Color Profile command to assign a color profile to one or more photos. Select the photos and do File > Plug-in Extras > Assign Color Profile. You’ll be shown the currently assigned profile (if any) and a drop-down of color profiles installed on your computer. See Importing Frames for when to use this command.
Limitations of LUTs
Export LUT creates accurate LUTs for all the settings in the Basic, Tone Curve, HSL/Color, and Color Grading panels, except for Basic’s Highlights, Shadows, Texture, Clarify, and Dehaze. Other Lightroom develop settings that cannot be represented accurately by LUTs include the Detail, Lens Correction, Transform, and Effects panels . When exporting develop settings as a LUT, you will be warned if the selected photo or presets contain any of those incompatible settings, and except for Shadows and Highlights, Export LUT will ignore them when creating a LUT. Many popular Lightroom develop presets use those settings to a greater or lesser degree.
In general, LUTs can only represent develop settings that transform a given input color to the same output color uniformly throughout the image. But a develop setting like Clarity can transform a given input color to many different output colors, depending on the location of pixels with that input color and the colors of nearby pixels. LUTs are incapable of representing such transformations. (Mathematically, LUTs are functions mapping pixel colors to pixel colors; whereas develop settings are functions that take additional inputs, such as the location of the pixel within the image and the colors of nearby pixels.)
Further complicating the issue, many of Lightroom’s develop settings are “image-adaptive”. An image-adaptive setting may transform a given color in one image differently than in another, depending on the images’ content. For example, a Shadows setting of +30 may lighten a given color in one image more than in another. Since Export LUT uses a test pattern to translate develop settings into a LUT, the effect of a setting on a color in the test pattern may not be exactly the same as on the image you’re viewing in Develop.
Image-adaptiveness is why a develop setting applied to a raw may produce a slightly different effect than the same setting applied to a TIFF or JPEG exported from the raw. Since Export LUT uses TIFF test patterns, to get the best results, use non-raws (JPEG, TIFF, PSD) when previewing and creating LUTs.
Yet another reason to avoid using raws is that Export LUT can’t represent the effect of camera profiles (stored in .dcp files). Some VSCO presets use custom camera profiles and Export LUT can’t reproduce the effect of the profiles (since Export LUT’s test pattern is a TIFF and camera profiles can only be applied to raws).
Note that Export LUT can accurately represent the effect of enhanced profiles (stored in .xmp files), since they can be applied both to raws and TIFFs.
Coping with the Limitations
Don’t use raw photos: As explained above, use non-raw photos (JPEG, TIFF, PSD) when previewing or creating LUTs.
Use Tone Curve for large tonal changes: My experience has been that, for small and modest changes to the Basic develop settings of normally exposed photos, the exported LUT is usually fairly accurate. But for larger changes in the settings, especially with Highlights, Shadows, Whites, and Blacks, and with under- or over-exposed images, the exported LUT is less accurate due to their image-adaptive property.
To make large changes to highlights, shadows, and the white and black points, use the Tone Curve panel instead – it appears that it is not image-adaptive, and thus its changes will be more accurately captured by exported LUTs. You can change the white and black points with the custom point curve. Then click the curve icon in the lower-right corner of the panel and use the Highlights, Lights, Darks, and Shadows sliders to adjust the different regions of the tone curve.
Auto Tone: The Auto Tone setting can’t be directly represented by LUTs, since the actual develop settings applied by Auto Tone will change from image to image. However, you can apply Auto Tone (or the preset containing Auto Tone) to a representative image (e.g. a video frame) and then create a LUT from that image’s settings.
Video Color Management
To ensure your LUTs accurately recreate the look you see in Lightroom, you’ll need a workflow that’s correctly color-managed. This takes some attention to details, since the photo and video worlds approach color management differently.
Calibrated Monitors
If you don’t have a color-calibrated display, the results of applying the LUT to your video are unlikely to match the original appearance in Lightroom. In addition, make sure your video editor has enabled display color management:
Premiere Pro: Enable the setting Preferences > General > Display Color Management.
DaVinci Resolve: Enable the setting System Settings > Hardware Configuration > Use Mac Display Color Profile for Viewers.
Final Cut Pro X: No action necessary—Final Cut Pro always uses display color management.
Color Space of the Project Timeline
You’ll need to determine the color space of the video project’s timeline—this is the color space in which the video edits are being made and displayed. When you create a LUT, you’ll need to specify that color space in step 2 of Export LUT. Export LUT can only work with color spaces specified by ICC color profiles such as Rec 709 or Rec 2020. (See here for working with HDR and log-encoded video.)
Premiere Pro: Uses Rec 709 Gamma 2.4 by default. Newer versions of Premiere Pro have added support for editing log and HD video in their “native” color spaces, but I haven’t found documentation specifying the timeline color space in those cases.
DaVinci Resolve: Uses Rec 709 Gamma 2.4 by default. You can verify this by going to the Color Management tab in the project settings.
Final Cut Pro X: Uses Rec 709 Gamma 2.4 by default (but I haven’t found authoritative documentation).
Importing Frames
If you’re importing video frames into Lightroom, the frames must be assigned the profile of the color space of the video project’s timeline. Use the File > Plug-in Extras > Assign Color Profile command to check the profile and assign one if necessary. Once assigned the correct profile, the appearance of the frame in Lightroom should match its appearance in your video editor.
The Export LUT command will warn you if the selected photo is missing a color profile. Cancel the command, assign a profile with Assign Color Profile, and then check the photo’s appearance in Develop before invoking Export LUT again.
Export LUT includes two color profiles, Rec 709 Gamma 2.2 and Rec 709 Gamma 2.4. You may have other Rec 709 profiles installed on your computer, but beware their gamma may not be apparent from their names.
Frames exported by Premiere Pro and Resolve aren’t assigned any profile. (I don’t know what Final Cut Pro X does.) Lightroom will assume incorrectly such frames are in the sRGB color space, while they are actually in the timeline’s color space (usually Rec 709). If you don’t assign a profile to the frames, there will be a tonal and contrast shift between Lightroom and the video editor.
Color Profile for Export LUT
In the Export LUT command, select the color profile corresponding to your video project’s timeline. If you select the wrong profile, the LUT won’t accurately create the look of the selected presets or photos. (See Importing Frames for the two Rec 709 color profiles included with Export LUT.)
HDR and Log-Encoded Video
If you are editing HDR or log-encoded video (Sony S-Log, Canon C-Log, Arri Alexa LogC, etc.):
Final Cut Pro X: Set the project timeline to be in color space Rec 2020. When you import frames into Lightroom, assign them the Rec 2020 profile (if the profile isn’t already set), and export LUTs using the Rec 2020 Gamma 2.4 profile.
DaVince Resolve: In File > Project Settings > Color Management, set Timeline color space to Rec 2020 Gamma 2.4 or P3 D65. When you import frames into Lightroom, assign them that profile (if not already set), and export LUTs using the same profile.
Premiere Pro: As of December 2021, Premiere Pro has some ability to edit log and HDR video in their “native” color spaces, but I haven’t discovered authoritative documentation about the color space of the timeline. You’ll have to convert the log or HDR video to Rec 709 in the project timeline before applying a LUT created by Export LUT. This will necessarily clip the gamut and dynamic range of the video. If you know more about this issue in Premiere Pro, please contact me at the support email address.
Much Better than LUT Generator
The free IWLTBAP LUT Generator provides good value for its price. But Export LUT produces more accurate colors, is much easier to use, and has many more options:
More accurate colors: LUT Generator creates LUTs in the sRGB color space only, whereas the most popular video editors work in the Rec 709 color space by default. Thus, the colors and tones in the videos won’t always match what you see in Lightroom, especially in the shadows. (Rec 709 and sRGB are similar but not identical color spaces.)
In contrast, Export LUT generates LUTs in any color space (defaulting to Rec 709), so the colors and tones in your videos will more nearly match what you see in Lightroom.
Easier and faster to use: Converting a preset or a photo’s settings takes multiple steps with LUT Generator—generate a HALD, import it into Lightroom, apply a preset or copy the photo’s settings (ensuring you don’t copy the disallowed settings like Clarity), export the HALD, convert the HALD to a .cube, rename the .cube file.
But Export LUT takes just three clicks, remembering your previous settings. That adds up to a lot of time saved in your daily workflow.
In addition, Export LUT ignores develop settings like Clarity and Vibrance that LUTs can’t reproduce, and it warns you if those settings are present. This eliminates a common cause of inaccurate colors in videos. With LUT Generator, you must remember to remove those settings, and it’s too easy to make mistakes.
Convert many presets at once: LUT Generator forces you to convert one preset at a time, whereas with Export LUT, select multiple presets and convert them all at once.
More LUT sizes: LUT Generator gives you just two choices, 25 and 64. But Export LUT lets you choose any size up to 512, including the popular 32 (a good compromise between quality and speed).
Customizable naming templates: LUT Generator forces you to rename manually the generated .cube files, whereas Export LUT has customizable naming templates.
Keyboard Shortcuts
Use Any Menu to invoke any plugin menu item with just a few keystrokes and assign single-letter quick keys to the most-used menu items. Alternatively:
Windows: You can use the standard menu keystrokes to invoke Export LUT commands. For example, ALT+L opens the Library menu, U opens the Plug-in Extras submenu, and X invokes the Export LUT command.
To reassign a different final keystroke to an Export LUT menu item, edit the file Info.lua in the plugin folder. Move the & in front of the desired letter in the menu command’s name, changing the name itself if necessary.
To assign a single keystroke as the shortcut, download and install the free, widely used AutoHotkey.
Mac OS: In System Settings > Keyboard > Keyboard Shortcuts > App Shortcuts, click + to add a new shortcut. In the Application menu, tediously scroll to the bottom and select Other… Navigate to Applications > Adobe Lightroom Classic and select Adobe Lightroom Classic.app. In Menu title type three spaces followed by the name of the menu command, e.g. “Export LUT” (case matters and don’t enter the quotes). In Keyboard shortcut type the desired key or key combination.
Support
Please send problems, bugs, suggestions, and feedback to ellis-lightroom@johnrellis.com.
I’ll gladly provide free licenses in exchange for reports of new, reproducible bugs.
Known limitations and issues:
- Export LUT requires Lightroom 5.7 or later, Lightroom CC 2015, or Lightroom Classic—it relies on features missing from earlier versions. On Mac, OS X 10.8 or later is required; Export LUT will fail with a cryptic error message on 10.7 or earlier. The newer cloud-focused “Lightroom” doesn’t support plugins.
- If you get “Invalid license key” trying to enter your license key, follow these troubleshooting steps:
1. The license key should be of the form YYYYYYYYYYYYYYYYYYYY (20 letters and digits). If it has the old form XXXX-XXXX-XXXX-XXXX (16 letters and digits with hypens), you should have received a new-form key by email. If you didn’t receive it, please send me email.
2. Ensure you are running Export LUT and not Apply LUT or another plugin (do File > Plug-in Extras > Export LUT).
3. Check that you have the latest version of Export LUT by doing File > Plug-in Manager, selecting Export LUT, and looking in the Status panel.
4. If the version is earlier than 1.30, download and install the latest version, restart Lightroom, and then add the license key. - If you get the error “Generating Hald TIFF failed” or “Can’t generate Hald TIFF” and you’re on an Apple Silicon computer (M1 or M2), you’ll need to install Apple’s Rosetta 2 manually. See the second method, “How to Install Rosetta 2 via Command Line on Apple Silicon Mac”, in this article.
- Due to a Windows Lightroom bug, the Export LUT window may be sized too large for the screen if you’ve set a Windows display scale larger than 100%. To fix that: In Windows, do Settings > Display > Scale to find out the current scale (in percent). In Lightroom, do File > Plug-in Manager, select Export LUT in the left column, and enter the scale.
- On Windows, if the plugin is installed in a folder whose path contains non-English characters, a cryptic error message may result. Install the plugin in a folder whose path doesn’t contain such characters. There’s a problem with the Exiftool utility that probably won’t get fixed.
- The Bitdefender security software can cause mysterious errors in Export LUT when it tries to write files. Try temporarily disabling Bitdefender. If that eliminates the errors, try adding the file “exiftool.exe” in the “exportlut.lrplugin” folder as an exception to Bitdefender.
- A Lightroom bug may cause Export LUT to take a very long time to start if you have hundreds or thousands of develop presets installed. The only workaround is to remove most of the presets.
- Due to a Lightroom bug (fixed in Lightroom 8.2), Export LUT may incorrectly report that a preset contains Sharpening and Noise Reduction settings. You can safely ignore these warnings.
- A preset that doesn’t include Process Version and refers to a creative profile won’t be handled correctly, due to a Lightroom bug. The workaround is to apply the preset to a photo and then in Export LUT choose the option Selected photo in step 1.
Version History
1.2
- Initial release.
1.3
- Fixed error that occurred when the option One or more develop presets had never been selected.
1.4
- Plug-in window gets properly sized on smaller screens.
- Now handles unknown development settings in presets and photos more gracefully, listing them as “Unknown” rather than assertion failure.
- Correctly handles the develop setting WB: Auto (auto white balance).
1.5
- Requires Lightroom 5.7 or later.
- Expanded documentation on video color management and LUT limitations.
- Correctly identifies develop settings introduced in recent Lightroom releases (e.g. Dehaze).
- Option to generate legacy-format .cubes for Final Cut Pro X LUT Utility and “ffmpeg”.
- Two Rec 709 profiles included.
- Warning if selected photo doesn’t have an assigned profile.
- Assign Color Profile command.
- Color profiles listed by full description rather than filename.
1.6
- Plugin couldn’t be installed in folders whose paths contained spaces.
1.7
- Fixed bug with non-English characters in file and folder names. (The plugin still may fail on Windows if installed in a folder whose path contains such characters.)
1.8
- Fixed another bug with non-English characters in file and folder names, causing ExifTool to fail ungracefully; better logging in debug.log.
1.9
- Fixed bug with ICC profiles whose names are numbers.
1.10
- Added warning for very large LUT sizes.
1.11
- Handles non-English characters in usernames on Windows (works around a bug in ExifTool).
- Correctly handles case-sensitive volumes.
- Fixed bug on Windows where the list of presets froze on startup if Selected photo was previously selected. (This was caused by a Lightroom bug.)
- Updated to ExifTool 10.58.
1.12
- Fixed recently introduced bug with Windows Lightroom installed on a drive different from that of the home directory.
1.13
- Fixed typo in 1.12 that made it incompatible with Lightroom 5.
1.14
- Export LUT can now create LUTs for all the selected photos at once.
- You can provide your own template for the filenames of the generated LUTs.
1.15
- Fixed bug with missing photos.
- Better handling of malformed ICC profiles and non-profile files in the profile directories.
1.16
- Fixed bug in 1.15 bug fix affecting some Windows installations.
1.17
- Fixed “internal error” when clicking on a preset folder.
- Upgraded to ImageMagick 7.0.
1.18
- Provides a workaround when the Export LUT window is too large for the screen.
1.19
- Recognizes the new Develop settings introduced in Lightroom 7.3 and won’t generate warnings about them.
- Correctly handles enhanced profiles applied to non-raws. (It isn’t possible to generate a LUT from a raw with an enhanced profile applied.)
- Less confusing error message when a discounted license key is incorrectly used.
- The color profile defaults to Rec 709 Gamma 2.4.
1.20
- Does a better job of fitting the Export LUT window on smaller screens, working around Lightroom bugs.
- Updated to most recent ExifTool to handle HEIC images.
- Displays a warning in red when the destination folder doesn’t exist.
1.21
- Works around Lightroom 7.2 bug with develop settings incompatible with LUTs stored in presets. This only manifested with presets that made radical changes to tone and color.
1.22
- Fixes bug causing error “Can’t convert Hald TIFF to PPM”, caused by Lightroom 8.3’s use of the new EXIF field OffsetTime.
1.23
- Works around installation restrictions imposed by Mac OS 10.15 (Catalina).
1.24
- Recognizes the Develop setting Texture.
1.25
- No longer throws an ugly error complaining about an unreadable .icc profile when the plugin gets reinstalled in a different location.
1.26
- Updated to latest ExifTool 12.08 to fix an error reading the profile of a particular TIFF.
1.27
- Changed help web links to refer to new site structure.
1.28
- Worked around bug in Lightroom 10.0 that caused some settings of presets to be ignored when creating LUTs.
1.29
- Recognizes the new Color Grading settings of Lightroom 10.
- Defaults to size 64 (rather than 4) after entering a license key.
- Folder paths containing “$” are handled correctly.
1.30
- New method of licensing plugins. Users who have previously purchased licenses have been emailed replacement licenses, which must be used with version 1.30 and later. If you didn’t receive your replacement license, please email me and include the name, email address, and country under which you purchased your license
1.31
- Correctly handles files and folders containing ‘ and other special characters.
1.32
- Assign Color Profile defaults to Rec 709 Gamma 2.4.
1.33
- Fixed obscure bug with Lightroom 10.2.
1.34
- Recognizes new categories of settings and mask settings in Lightroom 11.
- Updated to ExifTool 12.36.
- Verifies the plugin is installed in a valid path on Windows.
- Updated Limitations of LUTs to clarify that creative profiles are compatible with Export LUT.
- Updated Video Color Management to reflect the improved color management and HDR and log-video capabilities of the popular video editors.
1.35 2023-11-21
- Recognizes new Develop settings introduced in Lightroom 13.
- Updated to ExifTool 12.70.
1.36 2025-04-12
- Slightly improved detection of Lightroom errors exporting HALD TIFFs.
- Updated to ExifTool 13.27.
1.37 2026-05-20
- Better error message when validating a newly entered license key.
- The Verbose debug logging in the Troubleshooting section of File > Plug-in Manager > Export LUT.
- Updated to ExifTool 13.57.